
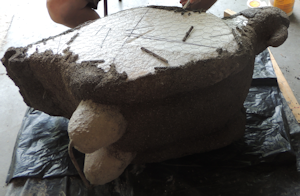
This is typical of the styrofoam form that I start with and then add rebar and chicken wire to hold on a hypertufa shell.


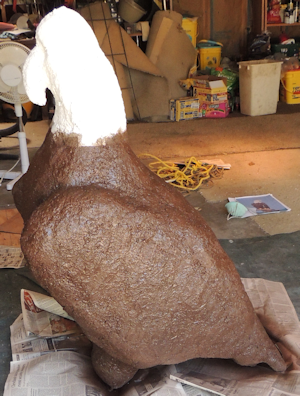
Once the hypertufa is cured, the critter is painted. When that is completed, the installation begins. What a mess that was!!!

I first had spent a bunch of time designing a plan to get Iggy up on the chimney and listed about 30 steps to complete the task (see clipboard on ground). I had wrapped the eagle in a blanket to protect it from abrasions during the installation process. You can see that my tall ladder was not tall enough for this job so I attached another ladder to the top of it. I enlisted four others (including my wife to document the entire couragous feat and pull the rope to haul Iggy up as well) to help me where I would have two on the ground and two of us up on the top of the chimney. It was very sophisticated and worked perfectly ... NOT!!! Turns out the plan was totally unusable.
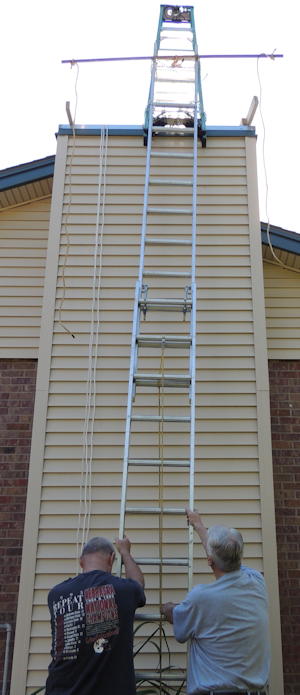
You can see the two guys getting the preconstructed ladder and pulley system up and holding it steady so two of us up on top could attach the supports to be able to raise Iggy. Had it measured precisely so it was tall enough to raise Iggy and swing him onto the chimney for mounting. The bracket system was just barely far enough from the chimney for Iggy to squeeze by.
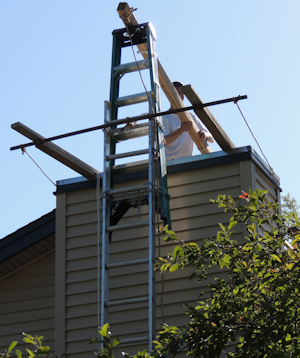
Here we are attaching the braces and pulley system. What could possibly go wrong?
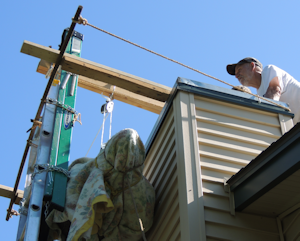
I'll tell you what could go wrong. I could forget to add in the thickness of the blanket covering Iggy to protect him which made the assembly too wide to fit between the chimney and ladder system. I didn't want to take that off because Iggy might get scraped on the sides and knock some of the hypertufa off. Because of ways the whole thing was put together, I couldn't make it wider without tearing the whole system apart. Getting the whole apparatus put together had taken about an hour so we had to go with Plan B

Plan B took about 10 minutes :) We took everything down and dismantled the double ladder system. Then I put two long ladders up on the side of the garage, right near the chimney and two of us just carried it up. Since it was mostly made of styrofoam with a thin hypertufa (also light-weight materal), it was not heavy at all and was easy to maneuver. This is a split-level home so it was easy to get it onto the second level where the chimney is. DOH!!! Should have thought of that to start with.
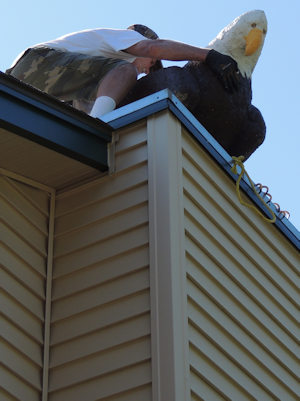
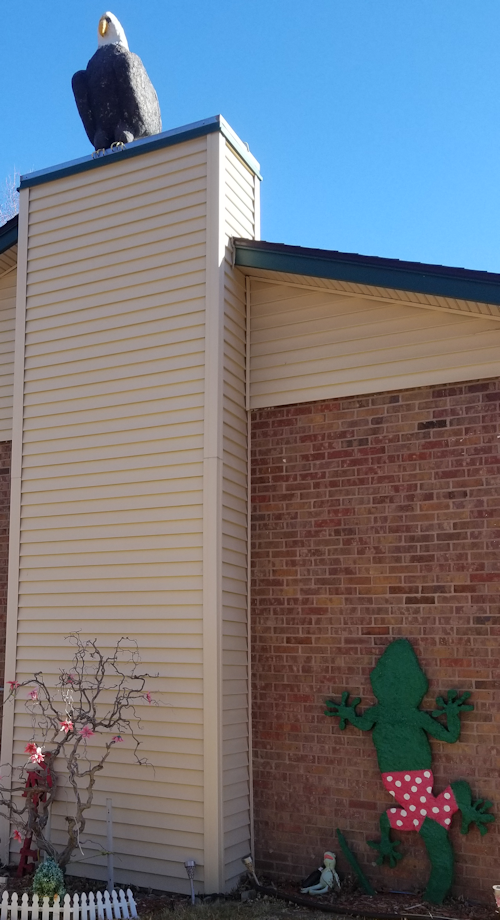
With Iggy up on top, we could finally start the mounting process.

Attaching the claws which are a critical part of the installation process.

Finally attaching the legs to the back and side braces to hold Iggy in place. I also added a bunch of concrete around all the braces on top of the chimney cap to make sure Iggy didn't blow away. That's Jeff Gillen up on the roof helping me on this installion process. He already does so much helping me on my RichKern.com site but is also willing to help install weird projects in my yard.
