
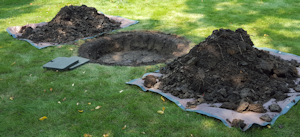
I had no particular inspiration for this piece of art but I knew I had to prepare a location that would allow me to reach my vision of multiple pieces of art at one location spread over several years. To start with, I dug a hole in the yard two feet deep and four feet in diameter. .The amount of dirt that came out of that hole was amazing


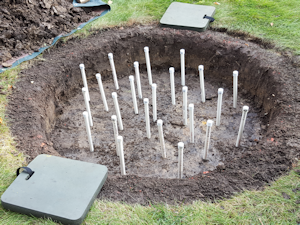
There are two ways that I mount my objects for ground installations. One is to place PVC pipe into the body and rebar in the ground so I can slide the PVC over the rebar to make it stand up. The other is the opposite where I pound PVC into the ground and put rebar in the object. As you can see here, the latter is the way my art pieces will be mounted here. I drove the pipes in about three inches and left a little over two feet showing.
Since I had no exact plan for my first installation or future projects, I had to make it flexible for whatever I may need. You can see that I pounded many pipes of PVC into the ground at irregular spacings and put caps on each to keep debris out during the remainder of the construction. The top of the caps were just above the level of the ground.
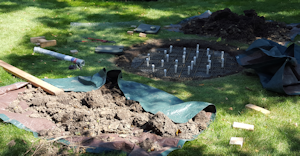
My next step was to stabilize the base of the pipes by placing a one inch layer of concrete at the bottom of the hole. Then I filled up the hole to about two inches from the top with dirt. You can see how much is left over that had to be hauled away. You may also be able to see how crappy and clayey the soil is on my property. The final step was to place a two inch layer of concrete that was stabilized with rebar and chicken wire for strength. Those pipes were not going to be shifting anywhere. I pity anyone trying to remove this in the future.
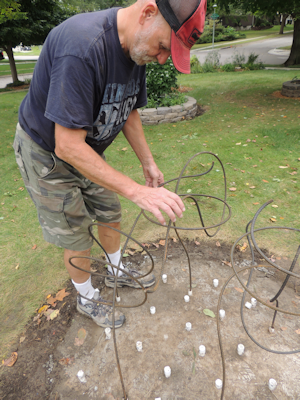
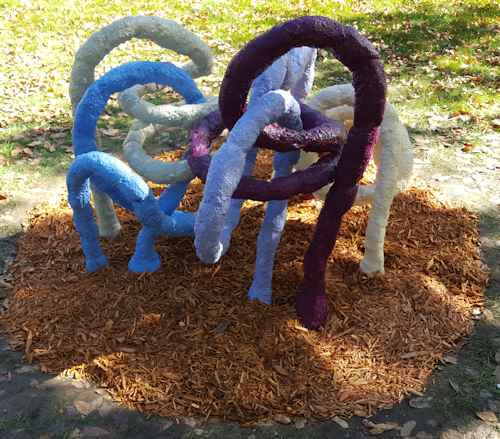
For my first installation, I initially decided to stick five 10-foot rebars into various holes and bend them around in all kinds of twisty interlacing shapes.
Since I was going place concrete around each rebar, I had to first wrap them with chicken wire to help hold the concrete in place while curing.

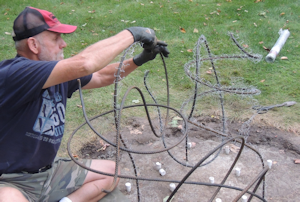
Next I added several lengths of rebar and attached them to the construction pieces to give each of them additional strength while placing the concrete.
At this point, I decided this still might not be stable enough to hold the rebar in place while adding the concrete so I added five additional pieces of rebar and joined each of them to one of the other five pieces already in place. This made each one much more stable. The additional pieces are not shown here.
One of my final steps was to pack concrete around each rebar. This had to be done in several stages along each length to allow the concrete to cure each time so I could add more later. Finally, I painted each piece a separate color and you can see the finished product at the top of this page.
