
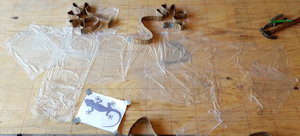
The construction for Geek is very similar to that of Girby. I first search for the image I want to use and then overlay it with a grid scaled to the size I want the final critter to be. Then I covered my plywood guide with Glad PRESS'N Seal over the approximate area where the critter will go. Next I start identifying the actual boundaries of the animal with nails and cardboard. In this case, it was very delicate work because the fingers of the gecko are so thin in parts. This caused problems later.


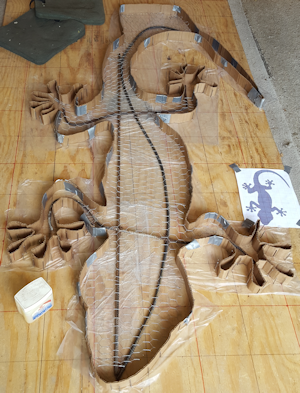
Once the entire outline is completed, I cut rebar and chicken wire to fit inside the form for strength and lined the inside of the cardboard with petroleum jelly so the hypertufa would not stick to it. This rebar and chicken wire was then set aside for later use.
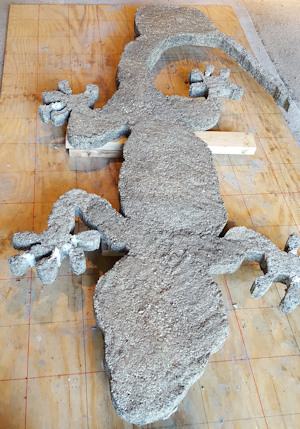
With the form in place and the support system ready, I filled in the bottom of the form with hypretufa and then laid the rebar and chicken wire support system in place.
Two things are worth mentioning here that may not be obvious. The tail has a flat long piece at the bottom. This will be buried in the ground to help support Geek from falling.
Another thing is the reason for the concrete blocks next to each side of the form. Not shown are support bricks under the top and bottom of the plywood to elevate those parts. Then the weight of the concrete blocks weighs the middle part down so when you view the plywood and form from the side, it has a concave look to it. This is so I can bury the tail a little ways away from the side of the house and lean it against it. Without the concave shape, only the tip of the nose would touch the home, but with the concavity, most of the top half will lean against it to distribute the stress.
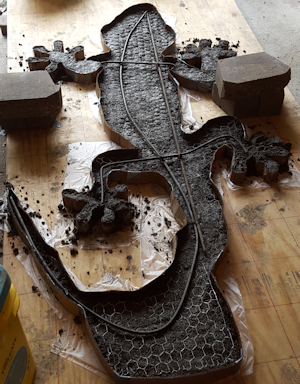
The next task is to cover the rebar and chicken wire and fill up the form with hypertufa. After that, wait for it to cure and remove the carboard and nail form. This is where a problem occurred. As mentioned above, the fingers were very thin and hypertufa is not very strong. As a result, some of the fingers broke off when the form was removed. It wasn't a huge issue because I have some good patching material that is stronger than concrete so I was able to reattach them so he had full climbing ability restored.
You can see some boards placed under the middle of Geek for support. I have turned him over and am getting ready to paint the bottom first. This gives him support in the middle and tips of tail and nose to help distribute the weight. What you can't see is that there are also thinner supports between the tips and the boards for additional weight distribution.

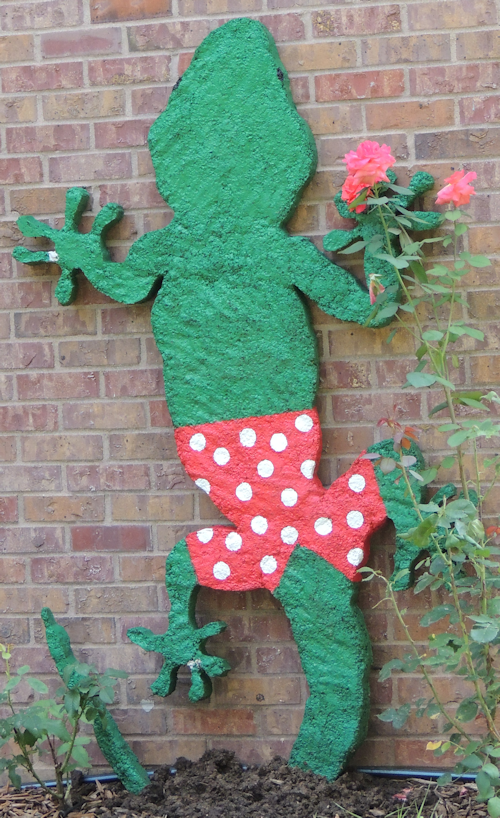
The only two steps left, at least planned steps, were to paint and mount. You can see his tail is planted a little bit away from the bottom of the wall so his top half is fully leaning against it. You can also see by examining the previous picture that his vertical center of gravity is over the block part of the tail to keep him from falling to one side or the other.
If you look carefully, you can see an addition step was to repair two more broken fingers. Since this picture was taken, I have repainted the bottom repair. I left the other on alone so it looks like he has a wedding ring on his finger. I didn't want him to be 'hit on' by all the other six-foot females geckos in the neighborhood.
