
As mentioned in the Oliver Twist description, my plan was to create a new sculpture at this location each year. It is time for a new creation and here is the teardown of Oliver Twist. Not an easy task with all the concrete, rebar, and chicken wire to get through.


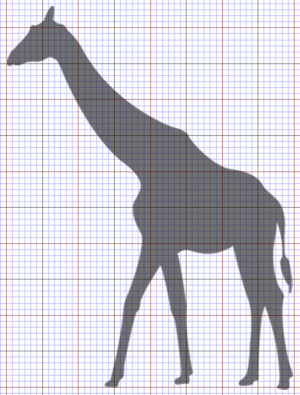
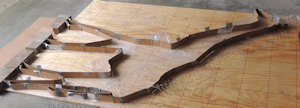
From the grid overlaying my target image (which started out to be a giraffe), you can see the sculpture will be 6.5 feet tall and 4 feet from the tip of it's nose to the tip of it's tail.
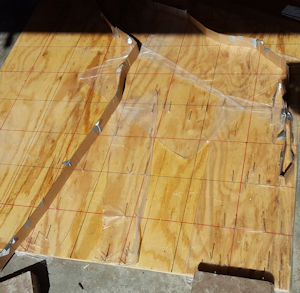
Next I had to transfer the gridded image to a 4x8 piece of plywood. No styrofoam used on this project. I started by drawing a grid on the plywood in 6-inch squares. I then identified the general area of where the outline of the giraffe would be and put down Glad PRESS'N Seal to keep the hypertufa from sticking to the plywood. Next I drove small nails into the plywood around the where the edges of the giraffe would be, identifying any inflection points to be sure to capture the entire shape. I then cut long strips of cardboard that were two inches wide and placed them on the inside of the nails while taping the cardboard to the nails to hold everything in place.
Here I have finished the outline of the sculpture so is about ready to start adding hypertufa. My next step is to coat all the inside of the form with petroleum jelly so the hypertufa will not stick to that either.
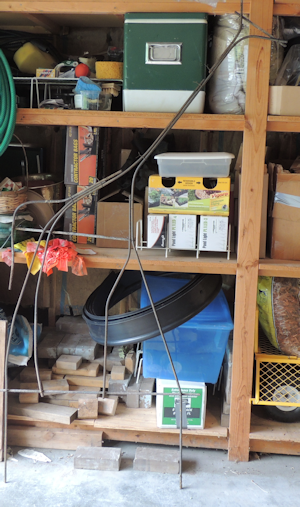
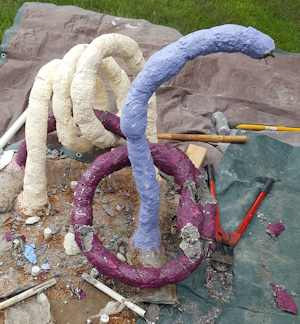
Leaning up against shelves in my garage is rebar shaped like the giraffe to be placed in the center after the back half of the hypertufa has been placed. I also cut up chicken wire for addional strength in the shape of the giraffe.
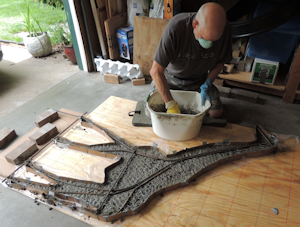
Here I have placed the back half of the hypertufa, added in the chicken wire and the rebar. You can also see that I mix my hypertufa and concrete in small batches.
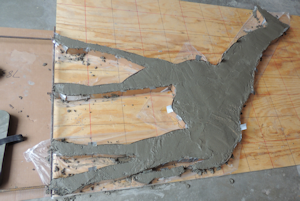
I have finished placing all the hypertufa and am just waiting for it to cure enough to remove from the cardboard form.
Also showing here is the two long pieces of rebar sticking out of the bottom of the two outside legs as well as two small stubs sticking out of the two inside legs. I designed the legs for the rebar extensions to be able to fit into four of the PVC pipes sticking up from the support base.
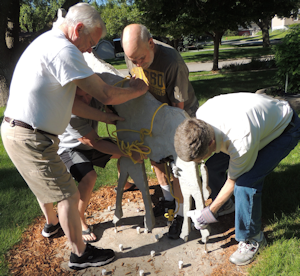
Hypertufa is much lighter than concrete but I wanted to have plenty of help to be able to carry this out to the installation location and slide the rebar into the holes for mounting. Fortunately, they did actually fit as designed. WHEW!!!
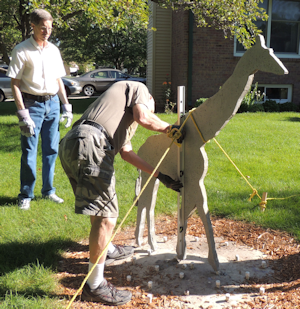
I stabilized the sculpture horizontally by staking it down with ropes and making sure it is vertical with a level. Not shown is that I also added horizontal rebar at the base by the legs and added concrete partially up the legs and the horizontal rebar to make sure it stayed vertical even through strong winds. So far, so good.
On a side note, the guy in the upper left corner is Jeff Gillen who also lives here in Lincoln, NE. He helps me extensively on RichKern.com and honestly, without his help, the site would not exist.
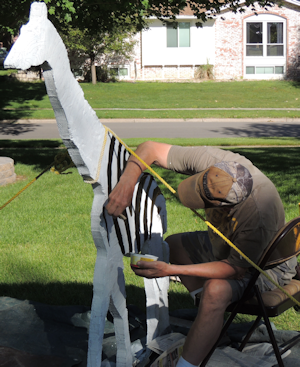
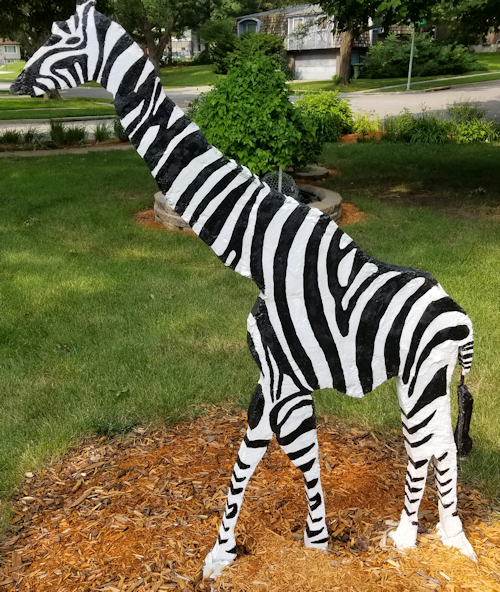
Before painting it, I was at a party with my cousin (who had joined my wife and I on one of our African safaris) and was telling him about my latest creation. I said I didn't know if I should just paint it like a regular giraffe or paint it all silver or gold and put spotlights on it so it will really show up at night. He said "Why don't you paint it like a zebra?" and "Girby" the Girebra was born. :)
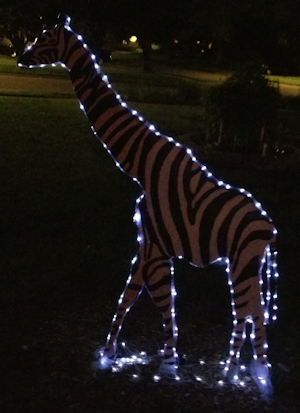
For additional interest, I attached a couple of strings of solar lights to outline the sculpture so it does shine up very well at night.
As I mentioned earlier, my plan was to build a new sculpture at this location each year but that idea has been scrapped because this is my favorite item and I can't bear to remove it. How could I possibly improve on perfection?
